


Windows and doors are a bit of a bind, repines our blogger – insulation would so much more effective without them!
I'm back now from Devon after an enjoyable but busy break with family and friends. This week, we'll be looking at how to address window and door openings within the cavity walls. We've obviously got to have windows and doors in our Passivhaus but they are a bit of a bind, creating all sorts of challenges regarding airtightness and thermal bridges. It would be a lot easier to just have insulation all the way around!
Windows
We have spent a lot of time developing the detailing for window openings, modelling various permutations in PHPP, the Passivhaus planning software, to try to address issues of insulation, airtightness, thermal bridging and thermal bypass:
Scroll down to view images of vertical section (from side) and horizontal section (from above).
Insulation
The Ecopassiv timber windows that we will be using in the build are triple glazed and have a whole-window U-value of just under 0.8W/m2K (and glazing U-value of 0.6W/m2K). As well as being triple glazed, with low-emissivity coatings and argon fill, windows for Passivhaus-level projects usually have to have some insulation in the frame (in this case polyurethane).
Thermal bridging
Windows are necessary thermal bridges within buildings, although they are also of course a source of solar energy: it is a matter of the energy balance. The challenge is to try to minimise any potential heat loss as far as possible, while using the optimum glazing specification.
For the Denby Dale Passivhaus we have decided to position the windows halfway within the insulation layer, to try to improve performance and minimise thermal bridging. In Passivhaus circles there are debates about possibly positioning windows further forward to get more solar gain, but the physics on this is as yet unclear.
At Denby Dale we will be placing the windows within a plywood form box we have created ourselves, which will be built in by the masons on the site within the blockwork. The advantages of this are that we've got a formwork for the openings within the masonry and that there's no mucking about.
Of course the plywood box itself acts as a bit of a thermal bridge but it only goes halfway through the cavity. It is a cheap and effective way of giving structural support for the windows and doors, and allows relative ease of attaining the required airtightness.
We are trying to wrap the insulation around the frame as much as possible. The fact that the Ecopassiv windows are inward-opening windows also helps with this, as the thicker part of the frame is on the outside.
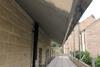
Because the windows are going to be placed within insulation layer, we needed some way of sealing the exposed fibreglass. For this we're going to use a cavity closer – in this case it is a three-sided pre-formed aluminium closer – let into the window frame and then sealed with mastic to the stone outside. We've also got a more traditional aluminium sill, very common in Europe but less so here, finished in the same way.
Airtightness
The plywood box we've developed for the window openings is a four-sided box screwed and glued with foamed PVA glue so that it gives a good basis for airtightness. Internally we will be using traditional two-coat wet plaster on the concrete block walls, which is airtight in its own right. The concrete blocks on their own are, of course, not airtight.
By contrast, dot and dab plasterboard is not generally airtight either, because the dabs behind the plasterboard do not seal the non-airtight blockwork. Parging blockwork before dot and dabbing might make it airtight, but I feel – from a good construction point of view – that with wet plastering you're sure of what you've done.
Junctions are always going to be difficult for airtightness because you get differential movement between different materials. In this case we've got plywood, wet plaster and the window, so we'll be using the Pro Clima airtightness product Contega, which is an adhesive-backed tape stuck to the plywood with a fleece wrapped into the wet plaster, making the junction between the plywood and plaster airtight even after the inevitable shrinkage cracking.
Another weak point will be between window and plywood box, and there we will use another Pro Clima tape, Tescon Profile, which permanently seals the gap between the window and the plywood.
The finished detail is going to look pretty traditional, apart from deeper reveals. There will be plaster walls and plasterboard on top of plywood boxes in the head and jambs. And at the bottom we're going to have a nice timber window board.
Thermal bypass
As I've discussed in previous blogs, thermal bypass is about ensuring that wind movement does not degrade the performance of the insulation. The aluminium cavity closer mentioned previously will be let into a groove in the front of the frame with a silicon mastic and then is masticked traditionally against the stonework reveal. The result will be that we are not getting any air movement through the insulation at this point but we are still maintaining the insulation at the front of the frame.
Doors
We are having a bit more trouble with the final detailing for the doors. Thanks to blog commentators John Carney and heinbloed, who have highlighted the cold bridge problem at the edge of the floor slab and threshold. Although this has been modelled in PHPP and has been deemed within acceptable parameters, we are still looking for solutions to help reduce the thermal bridge. We have some ideas, but are very open to suggestions, as the ideal threshold does not seem to exist. In particular, do tell us if you know of a suitable insulated threshold that could be fitted into a rebate in the concrete slab!
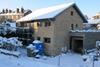
On site
We have had a site visit from representatives from Kirklees council around the Denby Dale site, including councillors, architects, planners and engineers. It was great to have an opportunity to explain the concepts of Passivhaus design to important local decision-makers, and we were asked some challenging and interesting questions, particularly about the relationship between Passivhaus standards and the Code for Sustainable Homes.
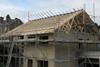
Otherwise, the walls are coming up – at first-floor level now – and the timber I-beam first-floor structure has been installed.
Vertical section

Horizontal section

Key
1. 300mm dritherm32 fibre glass insulation
2. 100mm natural Yorkshire stone in lime/sand mortar
3. 100mm dense concrete block in cement/sand mortar
4. preformed aluminium cavity closer powder coated
5. Two coat wet plaster
6. 18mm ply permanent formwork box
7. Air-tightness tapes
8. Cavity tray
For more information, go to www.greenbuildingstore.co.uk/denbydalehouse.
Postscript
Bill Butcher is director of the Green Building Store


20 Readers' comments