


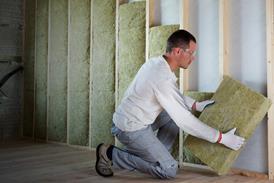


Air movement around insulation reduces its performance, but there are now good methods and materials to tackle the problem
Achieving windtightness and the minimisation of thermal bypass is not something that is measured in Passivhaus Planning Package software (PHPP) but something that is crucial for helping low energy buildings to perform. Air movement over or around insulation detracts from its performance quite significantly. As we have seen before (Week 6 thermal bypass), if air moves over or around insulation you can get a ‘thermal bypass’ which will reduce the effectiveness of the insulation itself - so we need the void in the roof to be as ‘still’ as possible.
This is ironic for someone of my age, because in the 1980s it was good building practice to have as much ventilation in the roof space as possible.
Windtightness
In those days an impervious bituminous felt material was usually used under the roof covering as insurance against blown rain and snow. Problems with condensation would arise as water vapour from the living area of the house would enter the roof space and then condense on the cold underslaters felt, – which, over time, could cause structural problems, rotting timber etc. To address this problem, building control started to require means of ventilation in the roof space to take away any of that moist warm air that had got through the ceiling and to help dry out any condensation that had formed. So, good building practice in the 1980s was having a howling gale in your roof space!
Luckily nowadays we have got far better methods and materials for dealing with this problem while also preventing thermal bypass in low energy and Passivhaus buildings.
Improved airtightness detailing, such as outlined last week, should help prevent the moist air from the living space getting into the roof space in the first place. Breathable underslate membranes are now available, which are vapour-open and so much easier to use. Any moist air that might get into roof space can escape through the roofing membrane, which can still be air and wind tight.
In terms of the windtightness measures at Denby Dale Passivhaus we have taken a six-step approach:
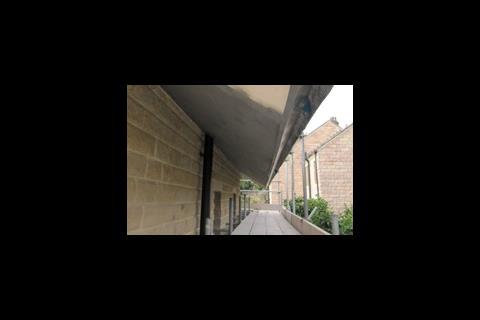
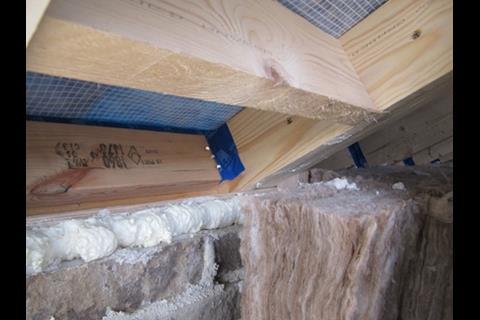
Step 1 - junctions between the outer stone walling meeting the underside of the timber truss overhangs at the eaves and the verge are being dealt with by use of timber noggins. Constructional foam is then sprayed between the stone and timber. This foam is good at filling uneven gaps, adheres to both surfaces and copes with the different expansion of stone and timber.
Step 2 - the soffit on the roof overhang (9mm plywood) has been screwed up into the timber before the masonry is finished and is also rebated into the back of the fascia board. The junction with the stonework is then sealed with frame mastic.
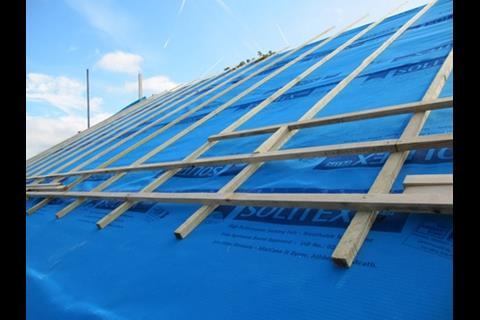
Step 3 - we are using Pro Clima high performance Solitex roofing underlay membrane which is vapour open but airtight, so allowing any moisture that has got into the roof void (which there shouldn’t be in the Denby Dale Passivhaus, but just as an insurance) to escape but stops air movement through it. The Solitex underslate membrane that we’ve used works very much on the principles of a Gore-tex jacket and is wind and air tight but vapour open.
Step 4 - as an extra windproofing measure, we have laid the underslating membrane more tightly than usual allowing us to get a good taped seal between the different layers. We use another Pro Clima product, Tescon tape, which has been developed to maintain its adhesion for the life of the building element. Having laid the underslate membrane tightly we have to ensure unhindered runoff for any blown rain or snow. This is achieved by using timber counter battening to hold the standard horizontal tile battens off the underslate membrane.
Step 5 - as an extra ‘belt and braces’ measure the first layer of Solitex has been taped to the above mentioned noggins which are themselves taped to the truss timbers.
Step 6 - lastly , we have put a bead of mastic on top of these noggins running the whole length of the eaves and up the verge detailing before the underslate membrane goes down.
All the above measures are examples of good building practices that are already employed within some sectors of the UK construction industry and offer an economical solution to improving windtightness and reducing thermal bypass in low energy and Passivhaus buildings.
On site
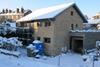
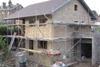
We have been delayed by a bit of a hiccup with the structural stability in one section of the roof (the south-west corner above the solar space). We discovered a weakness which hadn’t previously been picked up by myself, the architect, structural engineer or the designer of the roof trusses. We realised that the cantilever was too big for the timberwork that we had, so we have had to design some extra steelwork to go within the membrane of the timber/ roof. We wanted to maintain the clean lines of the overhang and solar shading, without having to put external brackets on.
It would have been much easier to have made some sort of bracket to have come off the corner posts of the windows to support the overhang, but we felt it wouldn’t have looked very good. So for aesthetic reasons we went for strengthening the truss rafters with extra timber and crucially steel plates, one running up the last truss and the other behind the fascia.
It is in position now and by today the roof will have been totally tiled. Our next job will be painting the soffits, barge boards and fascias with the chosen dark grey OSMO natural paints as well as installing the galvanised steel guttering.
Measures to improve airtightness in the roof space

1. Timber noggin
2. Timber counter batten
3. Construction expanding foam
4. Frame mastic
5. Taped butt joint at noggin ends
6. Breathable roof membrane
7. Taped roofing membrane
Postscript
Bill Butcher, director of Green Building Store


1 Readers' comment