


This month Peter Caplehorn of Scott Brownrigg runs through five steps to installing a solar thermal hot water system – which is one of the most effective ways to cut carbon emissions from a home
After the building fabric, improving the efficiency of water heating can be the most cost-effective way to cut carbon emissions from the average dwelling. As a result, the inclusion of solar thermal systems is undergoing something of a renaissance as a simple, practical method of heating water.
1 Understand the technology
The essence of solar panel water heating could not be simpler. Water flows through a closed system in pipes that are painted black to absorb the maximum amount of solar energy available. To prevent this energy dissipating, the pipes are covered by glass on one side and surrounded by insulation on all others. The water absorbs the energy and transfers it to a tank, usually by means of a heat exchanger.
This water is usually employed to raise the temperature of water entering the home’s hot water system, either providing the full temperature rise in hot conditions or allowing the main heating system to work less hard and hence conserve the primary fuel input in overcast conditions.
2 Choose the appropriate panel
Over the years, many types of collector panel have been tried. These have now evolved into three basic types. The flat-plate panel is the simplest and cheapest. Pipes are simply fixed to a flat plate, and this assemblage is painted black or may have a selective coating to enhance performance. The plate is then mounted in a simple box that has a clear plastic or glass front, and insulated.
The focused-tube collector is designed to collect even more energy than the flat-plate collector. This consists of a series of tubes, again painted black, fixed at the centre of glass tubes that are filled with gas or evacuated. The rear of the tube is painted to focus all the energy back onto the pipe. About 10 or 15 of these tubes are assembled to create a panel, with a header system joining all the pipes together.
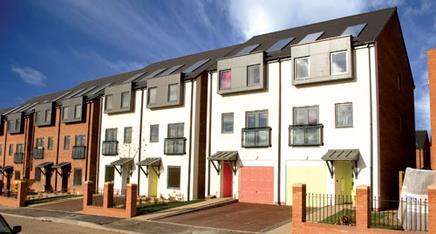
In response to the need to achieve a more built-in look, panels have been developed that resemble normal roofing tiles. To some extent, these sacrifice performance for aesthetics. They are essentially small versions of the flat-plate collector and normally resemble several roof tiles, which can be connected together to appear like a tiled roof.
3 Position the panel correctly
In the UK, the energy available is limited by our latitude, and the maximum theoretical value is 30-40% less than at the equator. It is also limited by weather conditions: the number of cloudless days is small in comparison with Mediterranean countries. However, the use of more efficient collectors can achieve good results during the summer and in cloudy conditions.
Placement of the panels is important.
These should be inclined 40-50° and face 30° either side of due south to achieve the best performance. There should be no obstructions to sunlight above them.
Planning constraints may also be important. Planning consent is normally required if the panels change the appearance of the building. This is especially the case if the building is listed or in a conservation area.
4 Ensure the structure can take the load
The roof needs to be designed to take the weight of the panels and the water. The potential wind uplift must also be resisted by the panel fixings. Bear in mind that the roof still needs to be weather tight and repairable under the panels.
5 Ensure easy access to the pipework
The connection to the hot weather system is straightforward but space for the additional tank and controls needs to be found. If you are retrofitting a system, the controls need to be compatible with the existing heating system. The panel’s plumbing connections should be easily accessed and protected from the elements.
Expertise is required in connecting the system; several examples have come to light of poor designs that contribute virtually no energy.


No comments yet